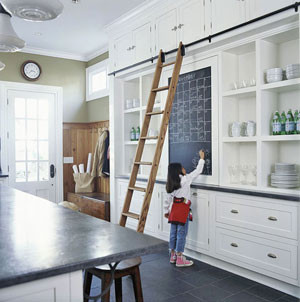
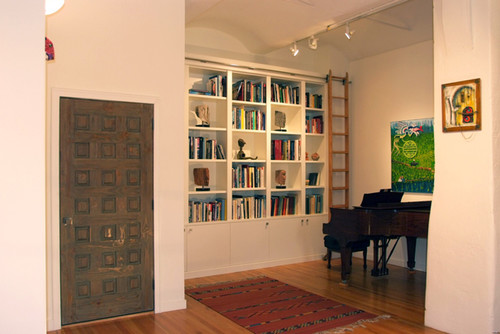
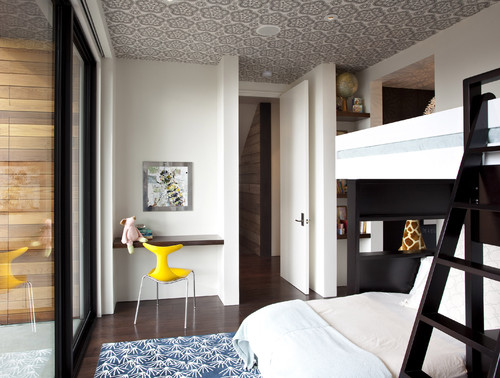
I love all things pink. Right now I wish I was in Chicago for the House Beautiful Power of Pink
Amy
Saturday, February 26, 2011
Friday, February 25, 2011
Progress - Day 131
This post should actually be called "Reverse Progress - Day 131"...
The week began with Dave discovering a crack in the concrete base of the fireplace while trying to fix the damper before our energy audit. Instead of ignoring the crack, he proceeded to tear out the concrete base and discover a large void underneath. Instead of ignoring the void (that has probably been there for 100 years...), he proceeded to dig out the hole even further only to discover that it was as deep as the basement. Instead of calling me for advice, he decided to wait until he had dumped 12 bags of concrete into the hole.
"Honey, how much concrete can I pour before rebar is required?"
Not the phone call you want to get at work when your husband is supposed to be at home installing baseboards!
Then today Dave returned to the house to discover that he forgot to turn on the furnace after the energy audit. The thermostat was reading 0 C and all of the plumbing was frozen solid. Once the plumbing started to thaw, the hot water line in the kitchen began dumping water all over the basement.
The basement that is currently packed to the rafters with 600 square feet of hardwood flooring, hundred of pounds of marble tile and half of our belongings.
Thankfully (so far) we were able to dry everything out and there is minimal damage. Tomorrow we will find out the full extent of the damage once the rest of the plumbing thaws...
Sigh...
Amy
Wednesday, February 23, 2011
ecoENERGY Retrofit Program Update
With the installation of the blown insulation in the attic, we have completed all of the items for our ecoEnergy Retrofit.
Here is an update of the work we have done for the program:
Replace furnace with 95% high efficiency furnace
Cost:$2,500 $1980 for the furnace, $800 for the installation and new ductwork
Estimated Rebate: $650 + $600 provincial rebate
Replace hot water tank with instant hot water system:
Cost: $1,300 (We actually installed this in 2007 but the evaluator was kind enought to give us credit)
Estimated Rebate: $315
Insulate walls (spray foam):
Cost:$5,000 $4,155
Estimated Rebate: $1,815
Insulate attic and cathedral ceiling
(blown fiberglass, spray foam):
Cost:$4,000 $1,650 for spray foam, $320 for blown fibreglass
Estimated Rebate: $750
Install new EnergyStar windows and doors:
Cost:$25,000 $7,526 for windows, $6,872 for doors
(Half of the windows and doors were installed in 2008 but again the evaluator gave us credit)
Rebate: $480
Improve air seal (spray foam, new windows & doors):
Cost: $0 (Included in items above)
Estimated Rebate: $190
Install low flow toilets:
Cost: $500 (Installed in 2006 and 2008)
Estimated Rebate: $130
For the time being we have decided to forego the rebate for the basement insulation simply because we have too much on our plate (and in the basement) with the remainder of the renovation on going. We will be keeping it on our future "to-do" list since even without the rebate it will be worth our while to complete.
We have booked the evaluator from ATCO EnergySense to return to complete the follow-up evaluation today.
Then we will find out how much our work has actually improved the energy efficiency of our home, what our new Energuide Rating is and how much we will get back in rebates. Should be interesting to see if we achieve the Energuide Rating of 70 that was predicited in our first evaluation!
Amy
Here is an update of the work we have done for the program:
Replace furnace with 95% high efficiency furnace
Cost:
Estimated Rebate: $650 + $600 provincial rebate
Replace hot water tank with instant hot water system:
Cost: $1,300 (We actually installed this in 2007 but the evaluator was kind enought to give us credit)
Estimated Rebate: $315
Insulate walls (spray foam):
Cost:
Estimated Rebate: $1,815
Insulate attic and cathedral ceiling
(blown fiberglass, spray foam):
Cost:
Estimated Rebate: $750
Install new EnergyStar windows and doors:
Cost:
(Half of the windows and doors were installed in 2008 but again the evaluator gave us credit)
Rebate: $480
Improve air seal (spray foam, new windows & doors):
Cost: $0 (Included in items above)
Estimated Rebate: $190
Install low flow toilets:
Cost: $500 (Installed in 2006 and 2008)
Estimated Rebate: $130
For the time being we have decided to forego the rebate for the basement insulation simply because we have too much on our plate (and in the basement) with the remainder of the renovation on going. We will be keeping it on our future "to-do" list since even without the rebate it will be worth our while to complete.
We have booked the evaluator from ATCO EnergySense to return to complete the follow-up evaluation today.
Then we will find out how much our work has actually improved the energy efficiency of our home, what our new Energuide Rating is and how much we will get back in rebates. Should be interesting to see if we achieve the Energuide Rating of 70 that was predicited in our first evaluation!
Amy
Tuesday, February 22, 2011
How to: Insulate an Attic
It is not very cost effective to use spray-foam insulation in the attic so we chose to use a blown-in fibreglass from Owens Corning. Fortunately Home Depot now rents the equipment for blown-in insulation so we were able to do it ourselves for under $300.
Materials:
In order to qualify for the government rebate we need to achieve R50. We chose to ignore the contribution of the batt insulation and install the 19" of blown insulation needed for R50. When you rent the machine they provide you with handy paper rulers to measure the depth of the insulation.
It took us under an hour to blow in all of the insulation. And we were able to do it all with out disturbing the creepy cobwebs on the chimney!
Materials:
- Blown insulation
- Batt insulation
- Blown insulation machine
- Attic vents
- Mask
- Glasses
- Gloves
- Ruler
Step 1: Preparation
In order to prevent the insulation from falling out the attic door, we built a short wall out of plywood to hold the insulation in place.
We also installed attic vents to allow airflow from the soffit to the attic and installed batt insulation between the rafters.
Step 2: Blow in Insulation
Following the instructions in the Owens Corning installation video, the process is surprisingly straight forward and easy:
- Snap together the two halves of the machine and plug in. It is recommended that the machine be located outside of the house but it does not produce any exhaust so we chose to put it inside to avoid having to clean insulation out of the snow.
- Connect hosing to machine.
- Turn on machine.
- Cut bags of insulation in half and feed one half at a time into the opening on the machine. Ensure that you do not feed the plastic bag into the machine - a cutting tool on the inside of the machine makes this very easy.
- Begin blowing insulation!
- Aim the nozzle about 8' in front of you and use your hand to direct the insulation downwards.
- Continue to blow in insulation until the entire attic is covered in an even layer. Make sure you start in the furthest corner from your attic access and work your way out!
Amy
Monday, February 21, 2011
Refinishing the Clawfoot Tub
When we were originally looking to buy a house, Dave had one item on his wishlist - a clawfoot tub. We were quite happy when we found our house with its original clawfoot tub - even if it had suffered some horrific refinishing attempts in the past. At one point the inside of the tub had even been painted with wall paint! (One day I will take the time to dig up photos of the original bathroom including its pea green walls, peeling lino floors, wisteria vine shower curtains and grey cabinets...)
We attempted to refinish the tub when we renovated the bathroom the first time 5 years ago. We found a electroplating company to restore the chrome on the tub feet. Dave spent days sandblasting the old paint off the outside of the tub and re-painting it with a black marine enamal. At this point the tub was turning out amazing. While stripping the paint Dave even uncovered the original date stamp on the tub from 1910!
Then we hired a contractor to refinish the inside of the tub with an epoxy enamel product and this is where things went wrong. Long story short, after Dave and the contractor were unable to agree on the quality of the finish after three attempts (the contractor refused to fully remove the old chipped finish before applying the new finish), the contractor kindly offered to fully refund our money so that he would never have to hear from us again.
Needless to say the finish on the tub did not last more than 6 months and we are once again faced with refinishing the tub. This time we have done extensive research and believe that a shop-applied baked porcelain enamel product is the answer. We have found a contractor who has been refinishing tubs for over 10 years, provides a 5 year written warranty and has promised to remove ALL the old finish before applying the new porcelain.
The tub will leave this week for three days of sandblasting and two days of baking in the oven. Hopefully when it returns we will have a shiney new 101 year old tub!
Amy
Sunday, February 20, 2011
Progress - Day 126
This week was all about doors...
Amy
Master bedroom closet doors.
And we still need to hang the bathroom door and attic door...
Spare bedroom closet doors.
Hallway doors.
And we still need to hang the bathroom door and attic door...
Amy
Saturday, February 19, 2011
Tuesday, February 15, 2011
Monday, February 14, 2011
Valentine's Day Bling
Dave and I have never been big into celebrating Valentine's Day. When most guys choose to propose on Valentine's day, Dave chose to propose on the ever romantic February 19th.
However, this year we decided to celebrate and buy ourselves a little Valentine's Day bling - a shiny new chrome faucet for the upsairs bathroom to match the new tub faucet.
However, this year we decided to celebrate and buy ourselves a little Valentine's Day bling - a shiny new chrome faucet for the upsairs bathroom to match the new tub faucet.
 |
| Emperor Faucet, Baths of Distinction |
Amy
Saturday, February 12, 2011
Friday, February 11, 2011
Wednesday, February 9, 2011
Progress - Day 114
Almost feels life we haven't made any progress in the past two weeks. Our energy seems to be wrapped up in everything but the house right now.
Dave was approached about a flight nursing position in Yellowknife. The interviewing, waiting, debating and then ultimately the hard decision to pass on the opportunity consumed a lot of our energy. What ever little energy we have had left was devoted to our cat Luci who reached the end of her battle with cancer today.
None the less - we have been getting stuff done - slowly.
The chimney in the office is now complete and looks fantastic. I am happy with how well the blue compliments the brick. (I apologize for the mid-project pictures, the camera got forgotten at the house)
The IKEA Pax closets are installed in the master bedroom. I am already dreaming of all the fantastic components I can buy...
After a week of noxious paint fumes and hand cramps, the stairs and fireplace are coming along. Still along way to go...
We are hoping to escape to the mountains skiing this weekend - hopefully a little sunshine and fresh air will give us the energy we need to tackle the renovation whole-heartedly again next week.
Amy
Saturday, February 5, 2011
Subscribe to:
Posts (Atom)


